


As the weather starts to warm up, many people turn their attention to their outdoor gardens, but it’s also a great time to think about sprucing up your indoor garden for spring. Indoor garden plants can bring life and color to your home all year round, but they need some extra attention as the seasons change. In this guide, we will explore some tips and strategies for getting your indoor garden ready for early spring, from assessing your young plants’ health to repotting and fertilizing, so you can enjoy a thriving and beautiful indoor garden throughout the season.
Step 1: Plan Your Garden Layout
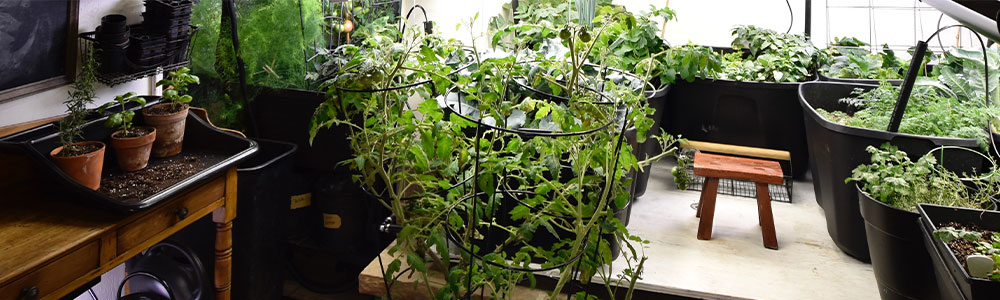
Planning your indoor garden layout is an essential step in creating a thriving and visually appealing space. Before you start, consider the amount of space you have available and what garden plants you want to grow. Think about the plants’ growth patterns and how much light and space they will need to reach their full potential. Consider grouping plants with similar needs together to make it easier to care for them. You can also use various containers, such as hanging baskets and wall planters, to add visual interest and make the most of your space. Additionally, don’t forget to consider the overall aesthetic of your indoor garden. Experiment with different plant combinations and arrangements to create a unique and visually appealing space. With a well-planned garden layout, you can create a beautiful and thriving indoor oasis that brings joy and life to your home.
Step 2: Clean Your Plants and Their Containers
Cleaning your garden plants and their containers is an important step in preparing your indoor garden for spring planting. Cleaning your indoor plants and their containers is crucial for their health and appearance. Dust and dead leaves can block sunlight and make the plant look untidy. To clean the leaves, use a soft cloth or sponge for smooth leaves, and a soft-bristled brush for fuzzy leaves. It is equally important to clean the plant containers before reusing them. Debris can harbor disease-causing organisms, and mineral deposits can harm the plants.
Cleaning and disinfecting the pots are easy steps that can ensure the success of containerized plants. To clean used containers, remove dead plants and soil, scrub with soapy water, rinse thoroughly, and soak in clean water until ready to use. Clay pots must be dried before use to prevent dehydration of newly potted plants. It is not recommended to disinfect pots with bleach as it can leave harmful residues. While washing plastic containers with soapy water is suggested, it’s not necessary if reusing soil from previous years. Instead, brush off dirt and wipe off gunk with a stiff bristle brush.
Step 3: Check for Pests
One of the essential tasks for maintaining a healthy indoor Spring garden is to regularly check for pests. Insects and other pests can easily infest indoor plants, causing damage to leaves, stems, and roots. Some common indoor plant pests include spider mites, mealybugs, and scale insects. To check for pests, start by examining your plants’ leaves, stems, and soil. Look for signs of insect activity, such as tiny webs or discoloration on the leaves. You may also notice small insects crawling on the plants or flying around them.
If you do detect pests, take action immediately to prevent them from spreading. You can remove small infestations by wiping the leaves with a damp cloth or spraying the plant with a mild insecticidal soap. For more severe infestations, you may need to isolate the plant or even dispose of it to prevent the pests from spreading to your other plants. Regularly checking your plants for pests and taking action when necessary can help ensure that your indoor Spring garden stays healthy and thriving.

Step 4: Harden Your Plants
Hardening off is the process of gradually transitioning a plant from a protected indoor or greenhouse environment to the harsh outdoor conditions of fluctuating spring temperatures, wind, and full sun exposure. The gradual introduction of these outdoor stresses will cause the plant to reduce its water intake and slow its growth rate. Hardening off is important because it enables transplants to withstand changes in environmental conditions they will face when planted outside in the garden. It encourages a change from soft, succulent growth to firmer, harder growth that can better withstand outdoor conditions.
To harden off plants successfully, it is important to reduce the amount of water plants receive but not allow them to wilt. Avoid placing seedlings outdoors on windy days or when temperatures are below 45°F. Cold frames provide an excellent environment for hardening off transplants. Pay attention to the weather forecast; if temperatures will fall below 45°F, be prepared to bring the plants inside. After proper hardening, tomato plants can usually tolerate light and unexpected frosts with minimum damage. The overall goal of hardening off is to slow plant growth so that they can adjust to a change in conditions.
Step 5: Repot as Needed
Repotting is an essential step in caring for indoor plants, especially if they have outgrown their current container. When plants become root-bound, their growth and health can suffer. Repotting allows the roots to spread out and take up more nutrients and water. When repotting, choose a container that is slightly larger than the current one, has drainage holes, and is suitable for the plant’s needs.
It’s also important to use fresh potting soil and to gently loosen the roots before placing the plant in the new container. Repotting can be stressful for plants, so it’s best to do it when they are actively growing in the spring planting. Some signs that a plant may need to be repotted include roots growing out of the drainage holes, water pooling on the garden soil surface, or the plant becoming top-heavy and tipping over. Regular repotting can help keep your indoor plants healthy and thriving.

Step 6: Provide Proper Lighting
Providing proper indoor lighting is essential for the health and growth of your indoor plants, especially during the spring season. Since natural sunlight may not be enough, it is important to supplement it with artificial lighting. When choosing lighting for your indoor Spring garden, consider the light intensity, color temperature, and duration of light needed for your plants. For example, plants that require full sunlight should be placed near a south-facing window or under a grow light that provides high-intensity light for at least 12 hours a day. On the other hand, plants that prefer low to medium light levels can thrive with a combination of natural and artificial LED grow light or a low-intensity grow light for 6-8 hours a day. It is also important to adjust the height of the light source as your plants grow to maintain the proper distance between the light and the plant’s foliage. Proper lighting is crucial to ensuring your indoor Spring garden thrives and produces healthy, vibrant plants.
Step 7: Control the Temperature and Humidity
Controlling the temperature and humidity in your indoor garden is crucial for the health and growth of your plants. Many indoor plants thrive in temperatures between 60-75°F (15.5-24°C) during the day and slightly cooler at night. It’s important to avoid sudden changes in temperature and drafts, which can stress your plants and make them more susceptible to diseases and pests. Additionally, proper humidity levels are essential for your plants. Most indoor plants prefer a humidity level between 40-60%, which can be achieved through the use of a humidifier, pebble trays, or by grouping plants together. Low humidity levels can cause leaves to dry out and curl, while high humidity levels can promote the growth of mold and other harmful organisms. By maintaining a consistent temperature and humidity level, you can ensure your indoor garden thrives throughout the spring season and beyond.

Step 8: Adjust Watering and Fertilizing
As the weather warms up in spring, it is important to adjust the watering and fertilizingroutine for your indoor Spring garden. With the increase in temperature and light, your plants may require more frequent watering. However, it is crucial to avoid overwatering, which can lead to root rot and other issues. One way to ensure proper watering is to check the moisture level of the garden soil regularly and adjust the watering schedule accordingly.
Additionally, with the increase in growth and activity during the spring planting, plants may require additional nutrients. Consider using a balanced, slow-release fertilizer or organic compost to provide your plants with the necessary nutrients. Be sure to follow the instructions on the product label and avoid over-fertilizing, which can cause fertilizer burn and damage to the plants. By adjusting the watering and fertilizing routine for your indoor Spring garden, you can help your plants thrive during the spring season.

Step 9: Prune and Trim
Pruning and trimming are essential maintenance tasks for indoor vegetable garden, especially during the spring when new growth is starting to emerge. Pruning helps to control the size and shape of your plants, promote healthy growth, and prevent pest and disease problems. To prune your plants, use a sharp, clean pair of pruning shears to remove weeds, and any dead, diseased, or damaged branches or foliage. You can also prune back any leggy or overgrown branches to encourage bushier growth. Trimming involves removing any excess foliage or stems that may be obstructing light or air circulation, which can help prevent the development of mold or other plant diseases. When pruning or trimming, be sure to follow the specific requirements for each plant, as some may require more or less pruning than others. It’s also important to avoid over-pruning, as this can weaken the plant and stunt its growth.

Step 10:Watch for Signs of Growth
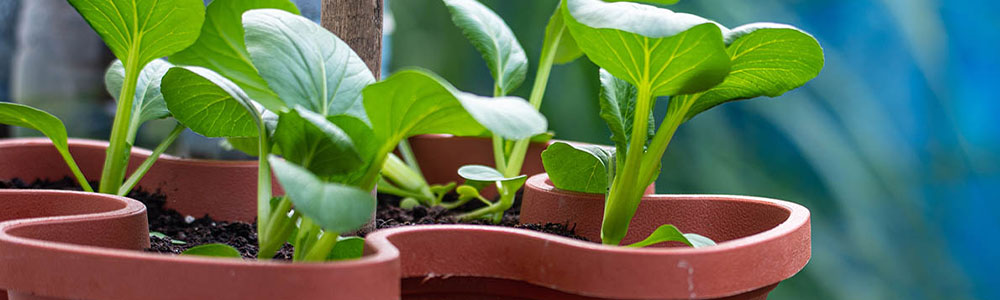
As the weather warms up and spring approaches, it’s important to keep an eye out for signs of growth in your indoor plants. New leaves, buds, and shoots are all indicators that your plants are coming out of their winter dormancy and beginning to thrive again. Some plants may need to be pruned or trimmed back to encourage healthy growth and prevent overcrowding. Regularly inspecting your plants for signs of pests, disease, or nutrient deficiencies can also help you catch any issues early on and address them before they cause serious damage. By keeping a close eye on your indoor plants and providing the proper care they need, you can ensure that they will flourish and thrive throughout the spring and beyond.
Spider Farmer Spring Sale is in Progress!
In conclusion, preparing your indoor vegetable garden for spring can be a fulfilling and rewarding task. By evaluating your garden site, planning your layout, cleaning your plants and containers, checking for pests, repotting as needed, providing proper lighting, adjusting watering and fertilizing, pruning and trimming, and watching for signs of growth, you can ensure a healthy and thriving indoor garden. With these tips in mind, you can look forward to enjoying the beauty and benefits of a vibrant indoor garden throughout the growing season and beyond. So, roll up your sleeves, start preparing and begin planting today to create your dream indoor garden.
To better help growers prepare your Spring garden, Spider Farmer is now having a spring sale with great discounts on different series of LED grow lights, grow tents and growing accessories on our official website. If you plan to start your indoor garden from Spring, it’s the best time for you to begin your plan. Hope every growers can choose your favorite product from Spider Farmer, please pay attention to our website and don’t miss this sale!